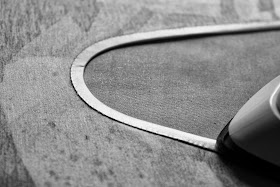
A new skirt pattern I'm working on called the FLASH N' DASH (pattern coming soon) can be made up in four different ways. Two of these involve binding an edge using bias binding...here's how you do it.
1. Using 12mm bias binding (mine is in a shiny satin finish) and with right sides together stitch the binding to the edge of your fabric just to the right of the fold line, in my example I stitched 1mm from the fold. Don't pull or stretch your binding or the fabric underneath.
2. Clip the seam (body fabric only) around the curve at the top of your split or as required. On the right side lightly press the seam toward the binding.
4. Fold and turn in the end of the binding and working from the wrong side slip stitch the binding in place. Don't pull the sewing thread too tightly as this will cause puckering; the finished binding should sit perfectly flat.
In this version of the skirt I left the hem edge raw, however, if turning up a hem do so before step 1.
5. Press around the curved top of your split to help the binding form a perfectly flat edge, it should not stick out.
The skirt shown is made from a medium weight jungle print jersey found at Tessuti in Melbourne; the contrast binding in pale lemon came from Clegs.
The FLASH N' DASH also features a rolled elastic waist for which a HOW TO can be found right here.


No comments:
Post a Comment